Most of the people must already be aware of this, but if not then stay tuned. Facebook has provided this feature to its users through which they can control who can see the Facebook posts or who can it be shared with. And you can do it from the Facebook website on a browser or the Facebook application for Android and iOS. In this article, we are going to share with you how to do it.
Share Posts With Selected Friends On Facebook
Now you can either use the Custom privacy method to share the post with limited friends or add your friends to the Restricted list whom you wish to keep the posts hidden from.
1 Share Posts With Selected Friends On Facebook1.1 Method 1 – Custom Privacy1.2 From Website1.3 From App2 Method 2 – Stop Friend From Seeing Your Facebook Posts2.1 Adding Friends To Restricted List From Website2.2 From Mobile Application2.3 Additional Method2.4 Wrapping Up
Method 1 – Custom Privacy
Some people don’t want to share a post like relationship status with friends and not family. Using this method you can hide posts from certain friends or allow them to be shared with selected friends only. You can upload photos on Facebook without worrying about them seeing it. So let’s see how.
From Website
- Log in to your Facebook account and click on the Create Post section and write your status or upload photos, whatever you want to post.
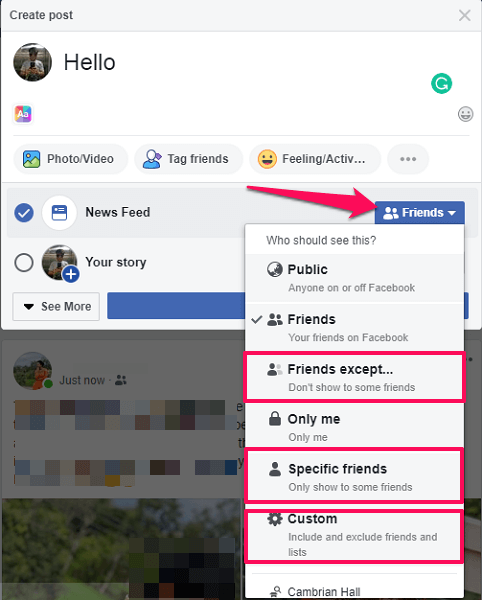
- After the above step, below the area where you have written the post, you will see the News Feed option. And in front of it, you will have the section for controlling the privacy of the post. That button may be showing Public or Friends, just click on it. See All to open additional options.
- After this, as per the situation select your Privacy –
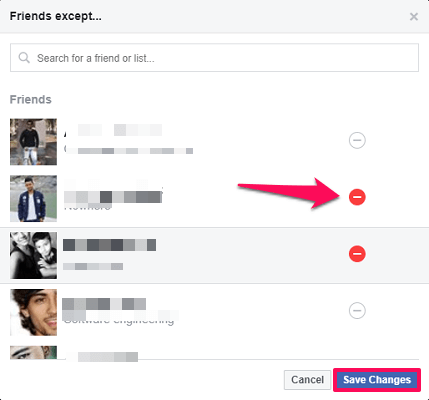
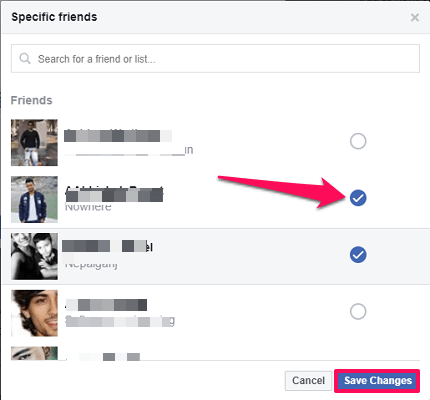
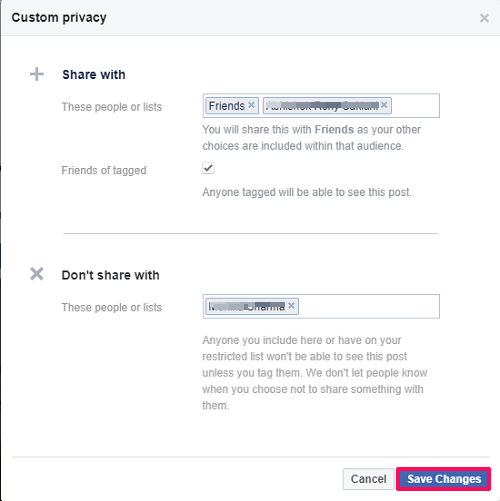
If you have only a few friends or family members with whom you don’t want to share the post then use Friends expect. Then from the list mark the friends with whom you don’t want to share the post. You can use the search bar to find them quickly. If you have less number of friends with whom you want to share the post, then use Specific Friends. Here you need to add your friends with whom you want to share your status or photos or other stuff. You can also use Custom Privacy, here similar to the above options, you can add friends to Share with or don’t share with the post at one place. After selecting friends to share or hide the post from any of the options above, click on Save Changes.
- As your post is ready and you have set the custom privacy for your post, click on the Share button to publish it. Now only the selected friends will be able to see or won’t be able to see as per your settings.
From App
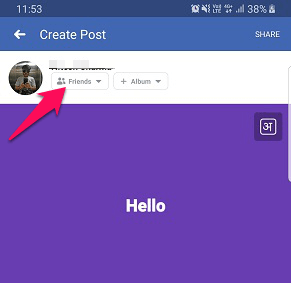
Head over to Facebook mobile application and create a post that you wish to share.
Now, once you are done creating the post, under your profile name, you will see the privacy option. It will either be Public or Friends, tap on it.
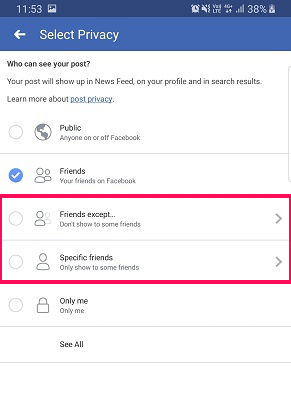
It will take you to the Select Privacy option.
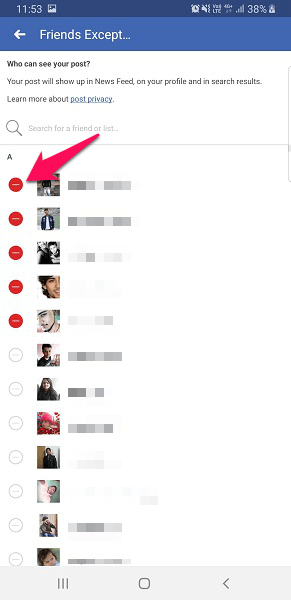
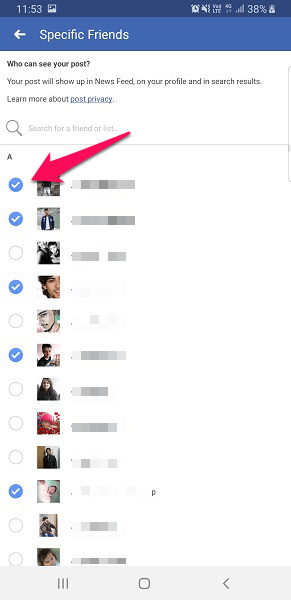
Now if you wish your post should not be visible to certain friends then select Friend Except. After this mark the friends with whom you want to hide the post. And if you want to share the post with selected friends then tap on Specific friends. Then again select the name of friends.
- After you are done with the above steps, hit Share and your posts will be shared or hidden from your friends as per your Privacy selection. Also Read: How To Disable Face Recognition On Facebook
Method 2 – Stop Friend From Seeing Your Facebook Posts
If there is someone, with whom you don’t want to share any of your posts and can’t unfriend or block that person, then you can simply add them to the restricted list. By doing this, they won’t be able to see what you update on your timeline. Here once you add the person on the Restricted list, then you won’t have to always select the custom privacy and go through the process of adding people every time you update a post like above.
Adding Friends To Restricted List From Website
- Open the users’ profile. You can use the search bar to find and directly open your friend’s timeline.
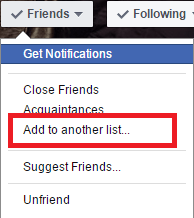
- On the timeline, click on the Friends button and select Add to another list.
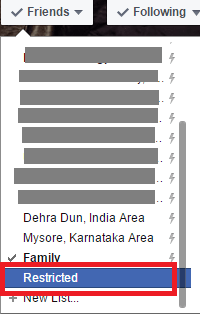
- Next, scroll down and choose Restricted.
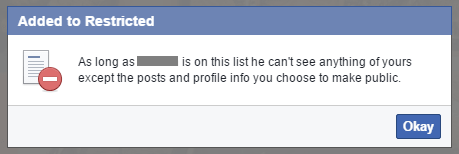
Once you select restricted, a message will pop up showing that the person will not be able to see your Facebook post as long as the user is on a restricted list.
You have successfully added your friend on the restricted list. Now he/she will not be able to see your Facebook post. Similarly, you can other friends to the list if required.
From Mobile Application
- Open the Facebook profile of your friend whom you want to restrict from viewing your post. 2. Once you are on the users’ timeline, tap on the “Friends” button as shown in the screenshot below.
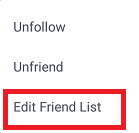
- You will get a list of options, choose Edit Friend List.
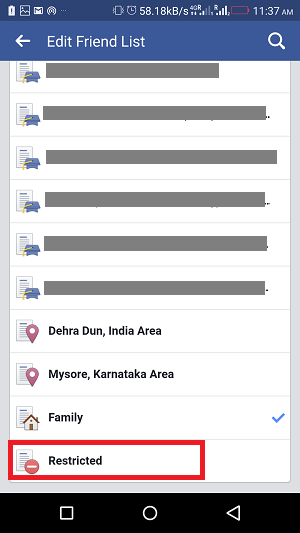
- A new screen will appear. Here scroll down and look for the Restricted option, tap on it.
That’s it. Your friend will not be able to see the post as long as they are on the restricted list. Important: Do remember, if you are uploading any post and want it to be hidden from the friends on your Restricted list, then select the privacy as Friends. If you keep it public then your friends added on the restricted list will also be able to see your posts.
Additional Method
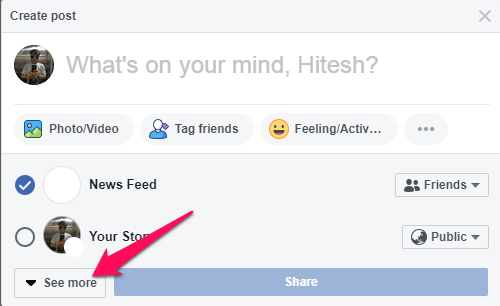
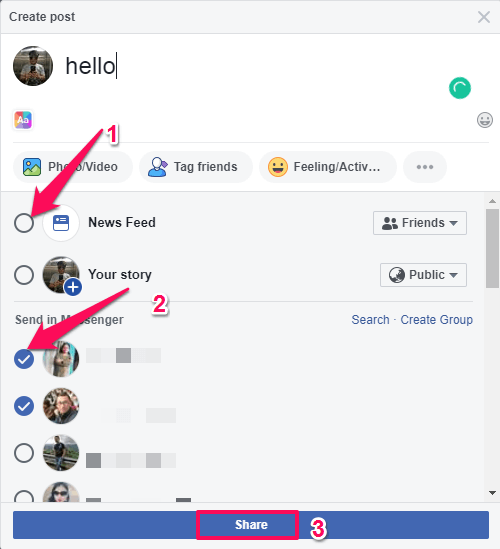
If your only aim is to share the post, rather than uploading it on the timeline or news feed, then you can select the option of sharing it directly with friends on Messenger from a web browser. To do this, select the See All option while updating any post.
And then choose the friends to share it with. But do remember to uncheck the News Feed or it will upload to your timeline. This way the post will be shared only to those friends whom you select. At last, hit Share to send the post.
Also Read: How To Turn On/Off Facebook Notifications
Wrapping Up
So using these methods you can either share your Facebook posts with selected friends or hide it from them. If the posts you wish to share with certain people are limited then you can use custom privacy. But if you post regularly and wish to hide all of them form certain friends then use the Restricted list method. In case of any query feel free to ask us in the comments section below.
