READ ALSO: Create shortcuts to open any application in Windows Below are the steps to partition the hard disk without formatting in Windows:
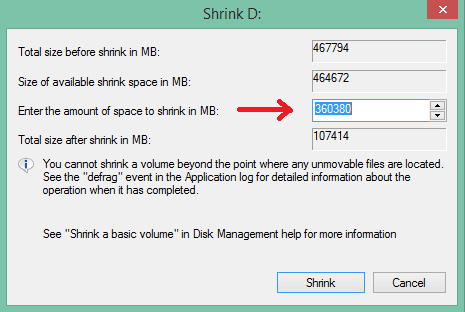
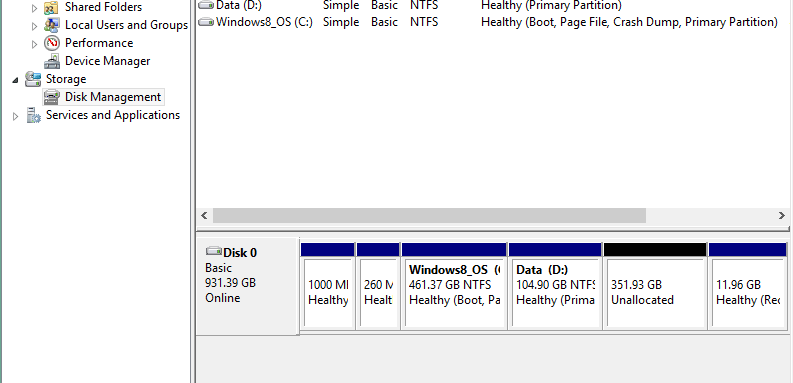
Right click on the computer icon on desktop. Click on Manage, a Computer Management screen will open. Look for Disk Management under Storage on left panel and click on it. On right panel you will have drives whose partition is already done. Now right click on the disk you want to do partition and select Shrink Volume. Next, a screen will appear where you have to select the amount of volume you want for that particular partition. Now click on Shrink. It will create an unallocated disk as shown in the picture. Right click on the unallocated disk and click on New Simple Volume. This will open a wizard where it will ask you to assign the name to the new partition created. Also don’t uncheck the quick partition option as shown in the picture, otherwise it will take too much time to format the new partition. Just follow the instructions to create the volume for you. It might take few minutes to perform the quick format for newly created partition however you can also choose the option not to format the new partition. In the disk management window itself, you can see the percentage of formatting done in the partition. Once the formatting is completed you have to check that if the newly created partition is visible or not. If not then follow the below method.
READ ALSO: Top 6 must have software’s for Windows & Mac
How to show newly created hard disk after partition in Windows 7/8/10
If you want to show the newly created partition, then follow the below steps:
In the Computer Management window, right click on the drive and click on Change Drive Letter and Paths. A window will appear where you have to click on Add button. Once you have done that, you can check your new drive will be visible.
The above method is very easy and you don’t have to install any software to partition hard disk without formatting in Windows. If you come across any problem, do let me know via comments.


